

Living in a small apartment? Here’s how I built a budget-friendly corner shelf that looks great and adds serious storage without taking up space.
The Struggle: Living Small, Dreaming Big
If you’ve ever lived in a small apartment, you already know the real enemy isn’t the rent—it’s the clutter. I love my cozy little place, but let me tell you, when you run out of cabinet space and start stacking books on your microwave, it’s time for a change.
I didn’t want to splurge on some overpriced storage unit that would crowd the room or make it feel even smaller. And I definitely didn’t want anything that screamed “college dorm room DIY.” So, I made a bold decision (well, bold for someone who doesn’t even own a drill): I was going to build a corner shelf. From scratch. On a budget. Without losing my sanity.
Spoiler alert: I actually did it—and I’m still surprised at how easy and affordable it was.
The “Aha” Moment That Changed My Corner Game
It all started on a rainy Sunday. I was curled up on the couch, scrolling Pinterest and sipping coffee, when I spotted it: a stunning wood corner shelf filled with plants, books, and little trinkets. It looked designer-made. But according to the post, it was actually a $30 DIY.
That was the moment I realized: my sad, empty apartment corner could be something special.
And guess what? Yours can, too.
Planning the Shelf (No Power Tools Required!)
I’m no carpenter, and I live on the third floor of a building where hammering past 7 p.m. is considered a crime. So, my shelf had to meet the following criteria:
- Simple construction (hello, command strips and wall brackets)
- Affordable materials (cue the $7 pine wood from the hardware store)
- Stylish enough to show off on Instagram
- Functional storage for books, keys, candles, and a plant baby or two
I grabbed my measuring tape, made some sketches (don’t worry, they were glorified doodles), and mapped out the corner space between my couch and balcony door. A standard L-shaped 3-tier shelf would fit perfectly.
My Step-by-Step Corner Shelf Build
Here’s how it came together in one weekend—and honestly, it was kind of therapeutic.
1: Choose Your Wood
I picked up two 6-foot pine planks and had them cut into equal triangle pieces at the store. (Yes, many stores will do this for free—bless them.)
💡 Try this pre-cut corner shelf kit on Amazon if you want to skip the sawing altogether—it’s renter-friendly and super affordable.*
2: Sand and Stain
I used a budget-friendly sanding sponge and a small can of walnut stain. Instant upgrade. This part was messy but satisfying—like giving your shelf a personality.
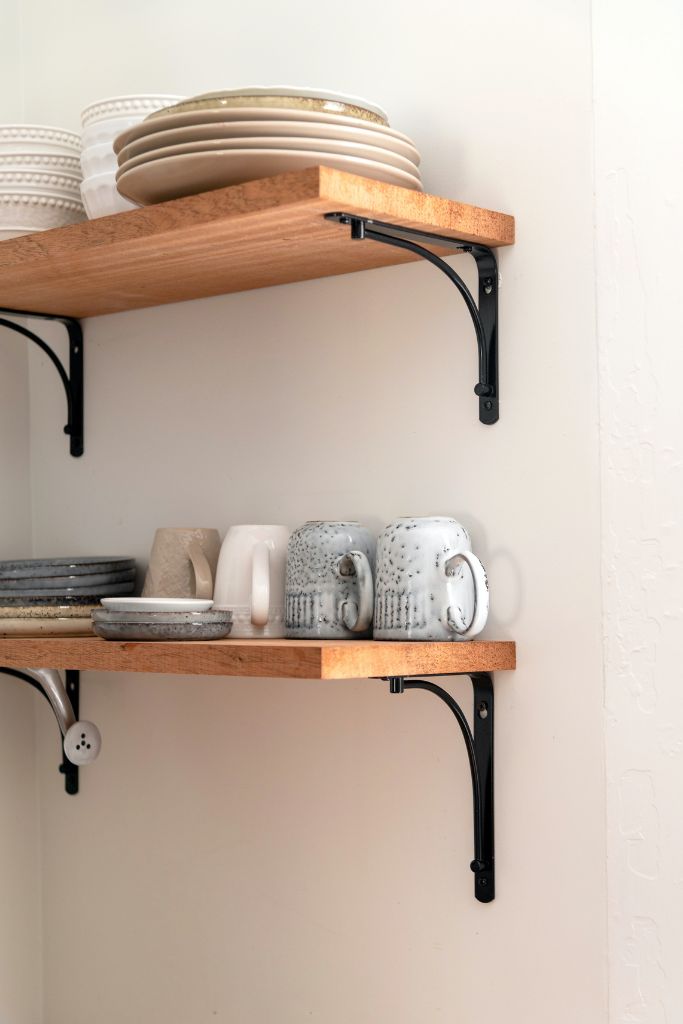
3: Mount the Brackets
I used sleek matte-black corner brackets—super sturdy and under $15 for a 6-pack. They gave the shelf an industrial-chic vibe without overpowering the space.
🔧 These floating shelf brackets are discreet, strong, and great for tight spaces.
Step 4: Install the Shelves
I leveled the shelves (I used a phone app for that!) and screwed them in carefully. If you’re renting like me, you can also use heavy-duty adhesive strips or no-drill drywall anchors for less damage.
Styling the Shelf with Purpose and Personality
Here’s the fun part: styling!
- Top shelf: A trailing pothos plant, a candle, and a framed photo
- Middle shelf: My favorite books and a little ceramic bowl for keys
- Bottom shelf: A wicker basket for remotes and mail
Mix textures and keep your color palette soft and neutral—it makes the space feel airy, even if you’re working with just 10 inches of wall.
What I’d Do Differently (So You Don’t Have To)
- Don’t eyeball the spacing (guilty). Measure it out—your shelf symmetry will thank you.
- Use painter’s tape to map where the shelf will go before drilling.
- Avoid too much weight if you’re not anchoring to studs—keep it light and stylish.
I learned the hard way when I plopped down a heavy vase and woke up to a crash at 2 a.m. (RIP ceramic fish.)
Final Thoughts: Small Corners, Big Potential
Sometimes all it takes is one little project to transform not just your apartment—but how you feel in your space. That empty corner I once ignored? Now it’s the first thing people compliment when they walk in.
It’s proof that you don’t need a big budget or a big space to make something yours.
Ready to Create Your Own?
If you’ve got an underused corner begging for attention, I say go for it! A DIY shelf is one of the easiest, most satisfying ways to upgrade your space—no contractor (or credit card debt) required.
FAQs
Q1: Can I build this without a drill?
Yes! Use adhesive brackets or no-drill anchors made for shelves.
Q2: How much weight can the shelf hold?
About 10–15 lbs per tier if properly anchored. Use lightweight decor for safety.
Q3: Can I use reclaimed wood?
Absolutely! Just sand it well and seal it if needed.
Q4: What’s the best layout for three tiers?
Leave about 12–14 inches between shelves for flexibility.
Q5: How do I prevent wall damage in a rental?
Use adhesive wall strips or anchors that don’t require deep drilling.
Q6: Is this safe in a humid room like the bathroom?
Use moisture-resistant wood or seal your shelf with a waterproof finish.
Q7: Can this be made floating-style without brackets?
Yes—use hidden brackets or a pre-made floating shelf kit.
Q8: Where should I place the corner shelf?
Try near your entryway, next to your couch, or even in a bedroom nook.
Q9: Can I paint instead of stain?
Totally! Choose a color that matches your decor vibe.
Q10: What’s a quick styling tip?
Use odd-number groupings (3, 5, etc.) and mix heights for visual interest.
Leave a Reply